Wednesday, December 10, 2014

Berried Goat Cheese Crisps

As soon as I set my eyes on a similar recipe, I knew that I had to find an occasion to make these beautiful berry crisps myself.  Thanksgiving day was perfect! Tangy goat cheese sits atop a crispy pretzel crisp accompanied by tart blackberries and is sweetly tempered with honey.  Trust me, these are heavenly.  Not only that, but they are quick and easy to make.  The only problem was that I should have doubled the amount that I made!  There is no question that these Berried Goat Cheese Crisps are going to be a new holiday tradition at my house.


Berried Goat Cheese Crisps

1 (10oz.) box Sea Salt Pretzel Thins
2 (4oz.) blocks goat cheese (if you can find honey goat cheese, it's even better)
2 (6oz.) boxes fresh blackberries
1 bottle/jar quality honey

On a medium platter, lay out as many pretzel thins as you have blackberries.  Place a small glob of goat cheese on each cracker - about 1-2 tsp.  Gently press 1 blackberry on top of (each) goat cheese.  Immediately before serving, drizzle each serving with honey.  Lastly, get out of the way quickly, because these are going to go FAST!

Enjoy (while you can)!

*TIPS*  This appetizer should be assembled just before serving, because you don't want the cracker to get soggy.  Soggy crackers are not fun.  Alternatively, you could set out the ingredients like they did here, but it could get messy.   Also, the better quality berries, cheese, and honey you use, the better this will taste.  We used MontChevre Honey goat cheese the first time, and an off brand of regular the second.  The off brand was a little more goat-y.  We also prefer to use our raw honey from our hives over anything store-bought, but we are a little biased ;)


Tuesday, December 2, 2014

Stuffed Dates

Hello, Everyone!  This year for Thanksgiving I made my very favorite appetizer:  Stuffed Dates. In my head, I always remember it tasting like Cheetos.  Sounds funny, huh?    You don't get the snack food right flavor away, but the aftertaste is reminiscent of white Cheetos.  My guess is that the parmesan shavings have something to do with it.  With this being said, make sure you get some while you have the chance.  They disappear like lightning!
We lost our original recipe, but this one has all the same elements - all THREE of them!  Could it be any easier?  I didn't exactly follow the recipe/measurements, so I'll include my very loose translation to make as many as will fit on a platter.  (Like I said - they go FAST!)
Stuffed Dates
1/2 cup walnut halves ( I toasted 2x extra to use on a salad)
1 (8oz.) pkg.  natural, whole pitted dates (I used DOLE.  Make sure they feel nice and soft through the package - you don't want tough dates!)
1 (3oz.) wedge sharp parmesan cheese (or parmesan aged as long as possible.  The one we used was aged at least 20 months)
Directions
Preheat oven to 350*F.  Arrange walnuts in an even single layer onto a cookie sheet.  Bake for 8-10 minutes, checking frequently.  Mine were perfect at 8 minutes.  You want them fragrant, but not browned.  Remove from oven  and allow to cool on cookie sheet; set aside.
Split dates open lengthwise, on only ONE SIDE.  Do not cut all the way through.  You want them to open like a clamshell.  Set aside.
Using a vegetable peeler or cheese slicer, shave parmesan into thin slices  about the length of your dates.
Once the walnuts are cool, stuff a parmesan slice into each date, followed by a walnut half.

Enjoy!

Friday, November 28, 2014

Homemade Sweet Potato Casserole

Hello, everyone! I hope you all had a great Thanksgiving. I don't know about you, but one of my favorite things to eat at Thanksgiving is sweet potato casserole. I have never known a Thanksgiving meal without it. This year I got to make it for the first time. I cooked it in the crock pot, and it makes things so much easier when you have a lot of other things to prepare. I will be doing this again in the future. These were delicious! I must say, it is really hard to get an attractive picture of sweet potatoes! (Especially when you can't get a picture of them before most of them are eaten!)

Sweet Potato Casserole

4 cans sweet potatoes (29 oz.), drained
2 cans pumpkin
2/3 cup melted butter
1 cup sugar
6 Tablespoons brown sugar
4 eggs, slightly beaten
2 tsp. vanilla
1 tsp. cinnamon
1/2 tsp. nutmeg
2/3 cup heavy whipping cream
1 1/2 cups chopped walnuts, optional
2 bags mini marshmallows 

In a crock pot, mash the sweet potatoes until there are no more lumps left. Mix in the pumpkin. 
Add each of the other ingredients in order, mixing well after each addition. 
Cook the sweet potatoes in the crock pot on high for about 2-3 hours. 
If you want, you can sprinkle a walnut/brown sugar strudel on top, or what I did was transfer it to a large baking dish and sprinkle the marshmallows on top. Bake it at 350* for 5-7 minutes, or until the marshmallows are toasted and brown. Enjoy! 

Monday, November 24, 2014

Apple Bread Pudding

I'll use any excuse to make bread pudding.  It is simple, homey, and full of custardy-goodness.  You can enjoy it warm, cold, a la mode, or au natural.  The flavor combinations are endless, but today's recipe features a festive mix of apples, raisins, pecans, and warm spices. 

I don't know about you, but we have had a remarkably cold November.  Some Apple bread pudding was just what we needed to take the chill off, and as an added benefit, it makes the house smell AMAZING!


Apple Bread Pudding

3 apples, peeled and chopped
4-5 cups soft cubed bread
1/3 cup raisins
1/2 c. chopped pecans
1 3/4 c. milk or almond milk
1/4 c. melted butter (or other fat)
1 c. brown sugar
3 eggs
1 tsp. vanilla
1 1/2 tsp. ground cinnamon
1 dash each ground nutmeg and ginger
3 dashes ground allspice

Preheat oven to 350*F.  Lightly grease a 9x13 baking dish.  Combine apples, bread cubes, raisins, and chopped pecans in a large mixing bowl.  In a separate, medium bowl, whisk together remaining ingredients.  Pour wet mixture over bread cube mixture and toss to coat.  Pour evenly into prepared baking dish.  Bake at 350*F for 40 minutes, or until a knife inserted in center comes out clean.  It's that easy!  

Friday, November 21, 2014

Cherry Pie Bars {dairy-free}

Hello, everyone! I have been venturing a little more into the dairy free world lately, so the next few recipes I'm sharing are going to be more of that kind of thing. If you aren't dairy free, they are still delicious, and you can enjoy them all the same. 
Today the recipe is for cherry pie bars. These are really good. I had to hurry to get a picture before they were all gone! Dairy free just got this much better. 

Cherry Pie Bars {Dairy-free}

                       For the crust:
3 cups all-purpose flour
1 1/2 tsp. baking powder
1/2 tsp. salt
1 3/4 cup sugar
1/2 cup shortening
1/2 cup coconut oil, softened
3 eggs
1 1/4 tsp. vanilla

1 1/2 cans cherry pie filling

                                   Glaze:
1 cup powdered sugar
1 tsp. vanilla
2-3 Tablespoons almond or soy milk

Preheat the oven to 350*.
Grease a glass 9x13 baking dish with coconut oil or shortening. Set aside. 
In a small bowl, combine the flour, baking powder, and salt. Set it aside. 
In a large bowl, cream the sugar, shortening, and coconut oil until smooth. Add the eggs and vanilla, mixing well after each addition. 
Gradually add the flour mixture to the wet ingredients. Make sure all of the flour is well incorporated. You may need to use a stand mixer for this step. 
Set aside about 1 1/2 cups of the dough, and press the remaining dough firmly on the bottom of the prepared pan, making sure it is evenly distributed. 
Spread the cherry pie filling over the crust. 
Using a cookie dough scoop or a regular spoon, drop the rest of the dough randomly over the top of the cherry filling. 
Bake it for 35-40 minutes, or until the dough looks cooked through. 
Place the pan on a wire rack to cool completely.
In a small bowl, combine all of the glaze ingredients until smooth. Drizzle it over the cooled bars. 
Once the bars are cooled, cut them into squares and serve. Enjoy! 

These were delicious. Try them out and let us know what you think! 

Monday, November 17, 2014

Candied Walnuts

It may not have snowed yet, but it feels like Christmas.  I know a whole lot of you aren't looking forward to the snow, but I LOVE it.  We made these walnuts because we love the hot, buttery smell that fills the house and reminds us of the festive holidays ahead.


Candied Walnuts

1 pound walnut halves
1/2 cup of white sugar
1/2 cup brown sugar
1 teaspoon ground cinnamon
1/4 teaspoon salt
6 T. milk
1 teaspoon vanilla extract

Preheat the oven to 350 degrees.
Spread walnuts on a baking sheet in a single layer.  Toast in preheated oven for 8-10 minutes.  Remove from oven to cool.
In a medium saucepan, whisk together sugars, cinnamon, salt and milk.  Cook over medium-high heat until the mixture reaches the soft ball stage (236*F).  Remove from heat and carefully stir in vanilla.  Add walnuts to mixture; stir to coat evenly.  Spoon walnuts on to a pan lined with parchment or aluminum foil.  Use a fork to separate.  Cool and store in an airtight container.  Enjoy!


I love these!!!  I am going to make them again around Thanksgiving, and give them to my friends.  You all should try them!

Friday, November 14, 2014

Smoked Sausage Dinner

Hello, everyone! It has been getting much colder lately, and we've even had some snow! Today's recipe makes a really good dinner, It's really quick and easy to put together. I've always served it with biscuits, and it is really filling and yummy. (we have a few biscuit recipes on here for you to chose from!) Enjoy! 

Smoked Sausage Dinner

1 package (14 links) smoked sausage
1 bag mixed vegetables (peas, corn, and green beans)
1 beef bullion cubes
1/2 cup boiling water
sprinkling of Italian seasoning

Preheat the oven to 450*.
Slice the sausage links into coins. Put it in a 9x13 pan with the vegetables and set it aside. 
Mix the bullion cubes in the hot water until they are dissolved. Pour it over the sausage. Sprinkle the Italian seasoning on top and mix it all together, then bake it for about 10-15 minutes, or until the sausage is lightly browned and cooked. Serve and enjoy! 

I hope you all enjoy this recipe as much as we do. We make it for dinner often. 
                           ~Nutmeg 

Monday, November 10, 2014

Lasagna (That isn't)

Hello Everyone!  Everybody in my house loves pasta.  Today's recipe is very much like lasagna in  that it is layered with sauce, cheese, and noodles.  However, I will not be calling it lasagna due to the protestations of my mother.  It's official name is Baked Ravioli, and it was delicious.  


Baked Ravioli
2 (24oz.) jars Dei Fratelli pasta sauce (or your favorite)
2 (16oz.) packages frozen meat ravioli
4 cups fresh spinach, chopped
Garlic salt
4 cups shredded mozzarella cheese
4 Tbs. grated parmesan cheese

Directions

Preheat oven to 350*F.  Pour 1/3 of the first jar of sauce into the bottom of a 9x13 pan.  Lay frozen ravioli down in even rows over sauce (this should nearly use up your first 16oz. package).  Next, layer 2 cups of chopped spinach, sprinkling very lightly with salt.  Follow with layering 2 cups shredded cheese, 2 Tbs. grated parmesan, and then the rest of the first jar of sauce.  Repeat ravioli-spinach-salt layering one more time, but then add the other jar of sauce and top with cheeses.

Cover baking pan with foil, taking care not to allow foil to touch cheese.  I used a couple of toothpicks to keep the foil propped up!  Place on center rack in preheated oven  for 40 minutes.  Remove foil,  and continue to bake for another 15-20 minutes, or until cheese is browned and bubbly on the edges.


Mmmm...such a simple way to make lasagna(that isn't)!  This recipe certainly isn't as labor intensive as a regular pan of lasagna.  What do you all think?  Leave a comment and let us know!

Friday, November 7, 2014

Blueberry Scones with Lemon Glaze {dairy-free!}

Hello, everyone! After reading the title of this post, you may already be saying, "Dairy free? It must be really gross!" These scones are far from gross. They are the first scones I have ever made, so you might say I was quite pleased with the results. The lemon glaze complements the blueberry really well, and it adds a nice flavor to them. There aren't any leftovers here! 
For all you dairy free people out there, this is a recipe for you. Even if you aren't dairy free, they still make a delicious snack or breakfast. Enjoy! 

Blueberry Scones with Lemon Glaze

4 cups flour
1 cup sugar
5 tsp. baking powder
1/2 tsp. cinnamon
1 tsp. salt
1 cup shortening, frozen
1 cup coconut milk
2 eggs
2 tsp. vanilla
2 cups frozen blueberries 

                             For the glaze:
2 cups powdered sugar
6 Tablespoons milk
1 Tablespoon lemon juice

lemon zest, for garnish (optional)

Preheat the oven to 400*. Line a large baking sheet with parchment paper or wax paper. 
In a large bowl, whisk together the first 5 ingredients. Cut in the shortening with either a fork or a pastry cutter until the mixture resembles crumbs.(When the shortening is frozen, it is easier to work with.)
In a smaller bowl, combine the coconut milk, eggs, and vanilla. Pour it over the flour mixture and gently mix it until it is combined. Be careful not to overwork the dough. 
Carefully fold in the frozen blueberries, making sure they are incorporated well through the batter. 
Divide the dough in half. Working with your hands floured, shape the dough into a ball and flatten it out on the baking sheet into about an 8-9 inch circle. The dough will be very sticky, so be careful. Repeat it with the rest of the dough. 
Using a sharp knife, cut the dough circles like a pie, in about 8 even slices. 
Bake it in the preheated oven for 20-25 minutes, or until golden brown and cooked through. 
While the scones are baking, prepare the glaze. Simply mix all of the ingredients together in a bowl, and whisk it until there are no clumps.
Let the baked scones cool for a few minutes, then drizzle the prepared glaze over them. I separated them so the glaze could run down the sides. Another thing you could do is completely dip the scones in the glaze. That way there is a whole outer layer on them. Let them sit for a few more minutes to allow the glaze to set. Serve warm. 

These were really good. I hope you try them out and enjoy them! 

                                                                                                                      ~Nutmeg

Monday, November 3, 2014

Peanut Butter Apple Pie

Did you know that November is Peanut Butter Lovers Month?  I didn't!  This recipe was featured in the most recent issue (November 2014) of Wisconsin Cooperative Energy News , which is a publication from my power company.  They usually have a page devoted to recipe exchanges and a one or two page highlight on a particular food group (pork, dairy, etc.)  This month's spotlight was on Peanut Butter. 

In all honesty, I did not have high hopes for this recipe.  I am not the pie baker in our house.  That is my husband's title.  He was out hunting, however, and I had nearly a bushel of apples laying around on the countertop that needed to be used.  There was also an extra pie crust sitting in the fridge.  I had already made a big batch of apple butter the day before, and would still have more apples than what I would need to make the Apple Pie Jam I had been thinking about.

What started out as an "eh, why not?" recipe turned out to be a new family tradition.  No joke, this pie was OUT. OF. THIS. WORLD.  I have not had a slice of pie this good since I had that little slice of cherry heaven in Door County last year (but that is another story)!  It was relatively easy, too!  We made a decision to have it every year on November 1st.  (Maybe more - 'cause it's just that good!)

Peanut Butter Apple Pie

1 pie crust, store bought or from scratch
7 apples, peeled, cored, and sliced
2/3 c. sugar
3 Tbs. flour
1 tsp. lemon juice
3/4 c. rolled oats
1/4 c. butter or other fat for dairy free(we used a scant measurement of lard and added a little more peanut butter)
1/4 c.  crunchy peanut butter
1/3 c. dark brown sugar
1/2 c. flour

Preheat oven to 350*F.  Place crust in a 9" pie pan and crimp edges.  Use pie weights or dried beans to weigh down the bottom.  Bake for 10-15 minutes, or until crust is lightly browned.

In a large bowl, combine apples, 2/3 c. sugar, 3 Tbs. flour, and lemon juice; pour into crust.  In a medium bowl, combine remaining ingredients for topping.  It is easiest to use your hands to mix and mash everything together until it falls into pea-sized pieces.  Don't worry if your pie is sky-high - the apples will cook down and level out.

Bake at 350*F for 40-50 minutes.  Keep the crust edges covered with foil until the last 15 minutes.  (At this point, mine actually ended up cooking for about an hour so that my crust browned enough - it was perfect).


Friday, October 31, 2014

Homemade Sweet Potato Fries

Hello, everyone! Today I actually have a recipe that is not anything pumpkin related! Be happy. And relieved. Oh, and go ahead and say, "It's about time!" 
Today's recipe is seasonal, however. I would eat it all year round, though, because it's just that good. I had the idea to make sweet potato fries after I saw a picture of them online. I never was very fond of them, but for some reason, that picture made them look really good. I was not disappointed. I made these two different ways, because I wanted to see which way would make them taste better. The fried version was my favorite. They were much crispier, and there was something about them that made them feel more like fries. Probably the fact that they were done in the deep fryer. 
I highly advise trying out this recipe. Leave us a comment telling us how it turned out too! Enjoy! 

Homemade Sweet Potato Fries

5 large sweet potatoes, peeled
seasoning salt
garlic
chili powder
oil, for frying 

Wash and peel the sweet potatoes. Cut them into sticks, and place in a large bowl. 
Heat up the oil in a deep fryer to 375*. If you don't have a deep fryer, heat up the oil in a large saucepan until it is hot. 
Fry the sweet potatoes in the hot oil until brown and crispy. Make sure you stir/flip them often to make sure they cook evenly. 
Transfer them to a paper towel-lined bowl, and sprinkle them with the seasoning salt, garlic, and chili powder. Toss them until they are well coated. Repeat with all of the rest of the sweet potatoes. Serve warm. 

These make a really yummy snack, and they are really easy to make! My family really enjoyed them. 

                                                            ~Nutmeg

Tuesday, October 28, 2014

Oven Roasted Carrots

Hello Everyone!  How was your weekend?  Mine went pretty well.  I went to a friend's house who I hadn't seen for a while.  We ate a lot of junk food.  I know, I know, shame on us.  Fortunately, it's the beginning of a new week, so let's start it out healthy!  Carrots are one of my favorite cooked vegetables.  I love that they get sweeter when they are cooked.

Oven Roasted Carrots

12 carrots, peeled and trimmed
1/4 cup olive oil
1/2 tsp. dried thyme
salt and pepper to taste

Preheat oven to 400*F.  Line a baking sheet with aluminum foil.  Halve your carrots lengthwise so that they cook more evenly.  Lay carrots out on the foiled sheet and drizzle with olive oil.  Toss them a bit to make sure they are fully coated.  Sprinkle with thyme, salt, and pepper.  Roast at 400*F for 35-40 minutes.


Yum!!!  You should all give these carrots a try.  They were so good that we could have doubled the recipe for our family of four!  What are your guys' favorite carrot recipes?  Leave a comment and share!

Friday, October 24, 2014

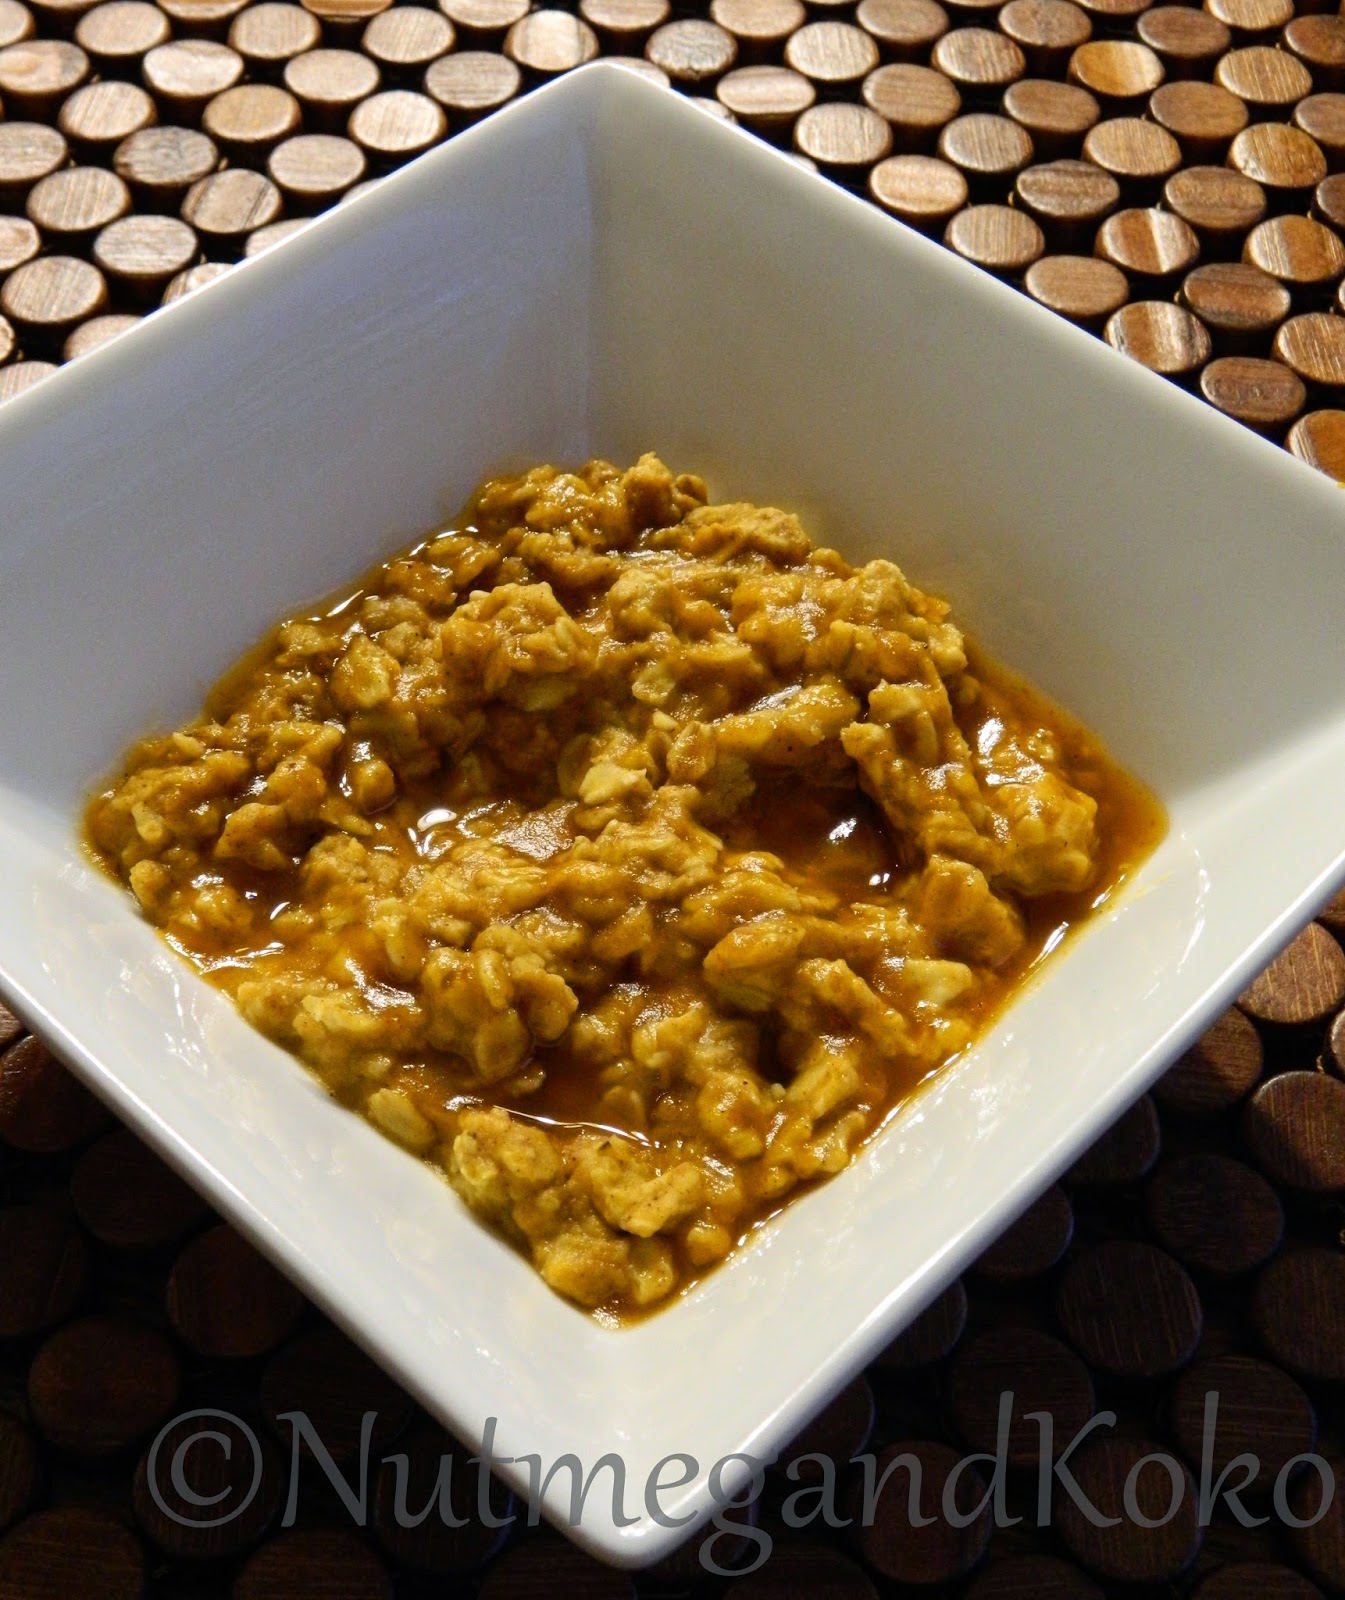
Pumpkin Spice Overnight Oats

Hello, everyone! I am taking this whole autumn thing really seriously, as you can probably very well see from all of my pumpkin spice recipes. I think Koko should do a pumpkin spice recipe or two, don't you? I have one more for you today, and who knows...there may be more coming!
Today's recipe is another really quick breakfast idea for those rushed mornings that everyone has. This is perfect topped with walnuts, and the syrup adds a really nice flavor as well. I discovered the part about walnuts after I took the picture, but it is delicious without them too. Enjoy!

Pumpkin Spice Overnight Oats

1/3 cup oats
1/4 cup milk
1/4 canned pumpkin 
1 tsp. pumpkin pie spice
2 Tablespoons brown sugar
pumpkin spice syrup (or syrup of your choice)
chopped walnuts (optional)

Combine all of the ingredients except the syrup in a mason jar or bowl. Refrigerate it overnight. 
In the morning, put it into a microwaveable bowl and microwave for 30 seconds, or until it is warm. (you don't have to heat it up if you don't want to.) Drizzle it with syrup of your choice, and sprinkle with walnuts. Enjoy! 
                        ~Nutmeg

Monday, October 20, 2014

Quick Berry Muffins

Hello Everyone!  My mom made these muffins, and I love them.  The thing is, I hadn't had time to get breakfast and had to catch the bus.  These little muffins were done three minutes before the bus came.  I am still not sure whether my mom has superb timing, or if the muffins had a mind of their own.  Although, I am inclined to believe that my mother just had great timing.


Quick Berry Muffins

2 cups flour
1 Tbsp. baking powder
1/2 tsp. salt
1/2 cup sugar
1 cup berries
1/2 tsp. vanilla
1/2 cup milk (or almond milk for dairy free)
1/4 cup vegetable or refined sunflower oil
1 egg

Preheat oven to 400*F.  Combine dry ingredients in bowl; stir in berries.

Add vanilla, milk, egg, and oil.  Mix to combine.  Pour batter into paper lined muffin tins, filling 3/4 full.  Bake 12-15 minutes in preheated oven.

Friday, October 17, 2014

Chocolate Peanut Butter Chip Cookies

Hello, everyone! I hope you have all been enjoying this beautiful autumn weather! 
I don't know about you, but I love peanut butter and chocolate together. They just happen to combine to make one of my favorite candies of all time...Reese Peanut Butter Cups. I wanted to make a cookie this week that had both peanut butter and chocolate, since I didn't have any Reese Cups on hand. They were delicious. Try them out and let us know what you think! Enjoy!! 


Chocolate Peanut Butter Chip Cookies

1 1/2 cups flour
3/4 cup cocoa powder
1 tsp. baking soda
1/2 tsp. salt
2 cups sugar
1 1/2 cups shortening or butter
2 eggs
2 tsp. vanilla
1 1/2 cups (or one 10 oz. bag) peanut butter chips


Preheat the oven to 350*.
In a medium bowl, combine the flour, cocoa powder, baking soda, and salt. Set aside. 
In a large mixing bowl, cream the shortening and sugar until smooth. Add the eggs and vanilla, and mix well. 
Gradually add in the dry ingredients, making sure that it is mixed well.
Add in the peanut butter chips, making sure it is evenly distributed throughout the dough. 
Drop by teaspoonfuls onto ungreased cookie sheets, and bake for 10-12 minutes. They will be slightly puffy, but will flatten more as they cool. Do not over-bake them. 

I was really happy with the way these cookies turned out. I will definitely be making these again in the future! 

                                                                            ~Nutmeg